How to Add a PTZOptics Camera to vMix
Getting Started
If you have already set up your camera on the network and are able to reach the web UI of the camera, great, you're nearly ready to start streaming! If not, that's fine, just follow this guide to get caught up to speed: Guide to Setting Up a PTZOptics Camera on a Network.
What You'll Need
- vMix installed (Windows)
- PTZOptics camera connected (via USB, HDMI/SDI, or IP)
- PTZOptics camera IP address (if using network)
Option 1 (Our Favorite): IP
To add your camera over the network via IP, you will need to have the camera plugged into either your computer or network with an ethernet cable. Once your camera is connected to the network and you are able to find the IP address move on to step 1.
Step 1: Open vMix and Add Input
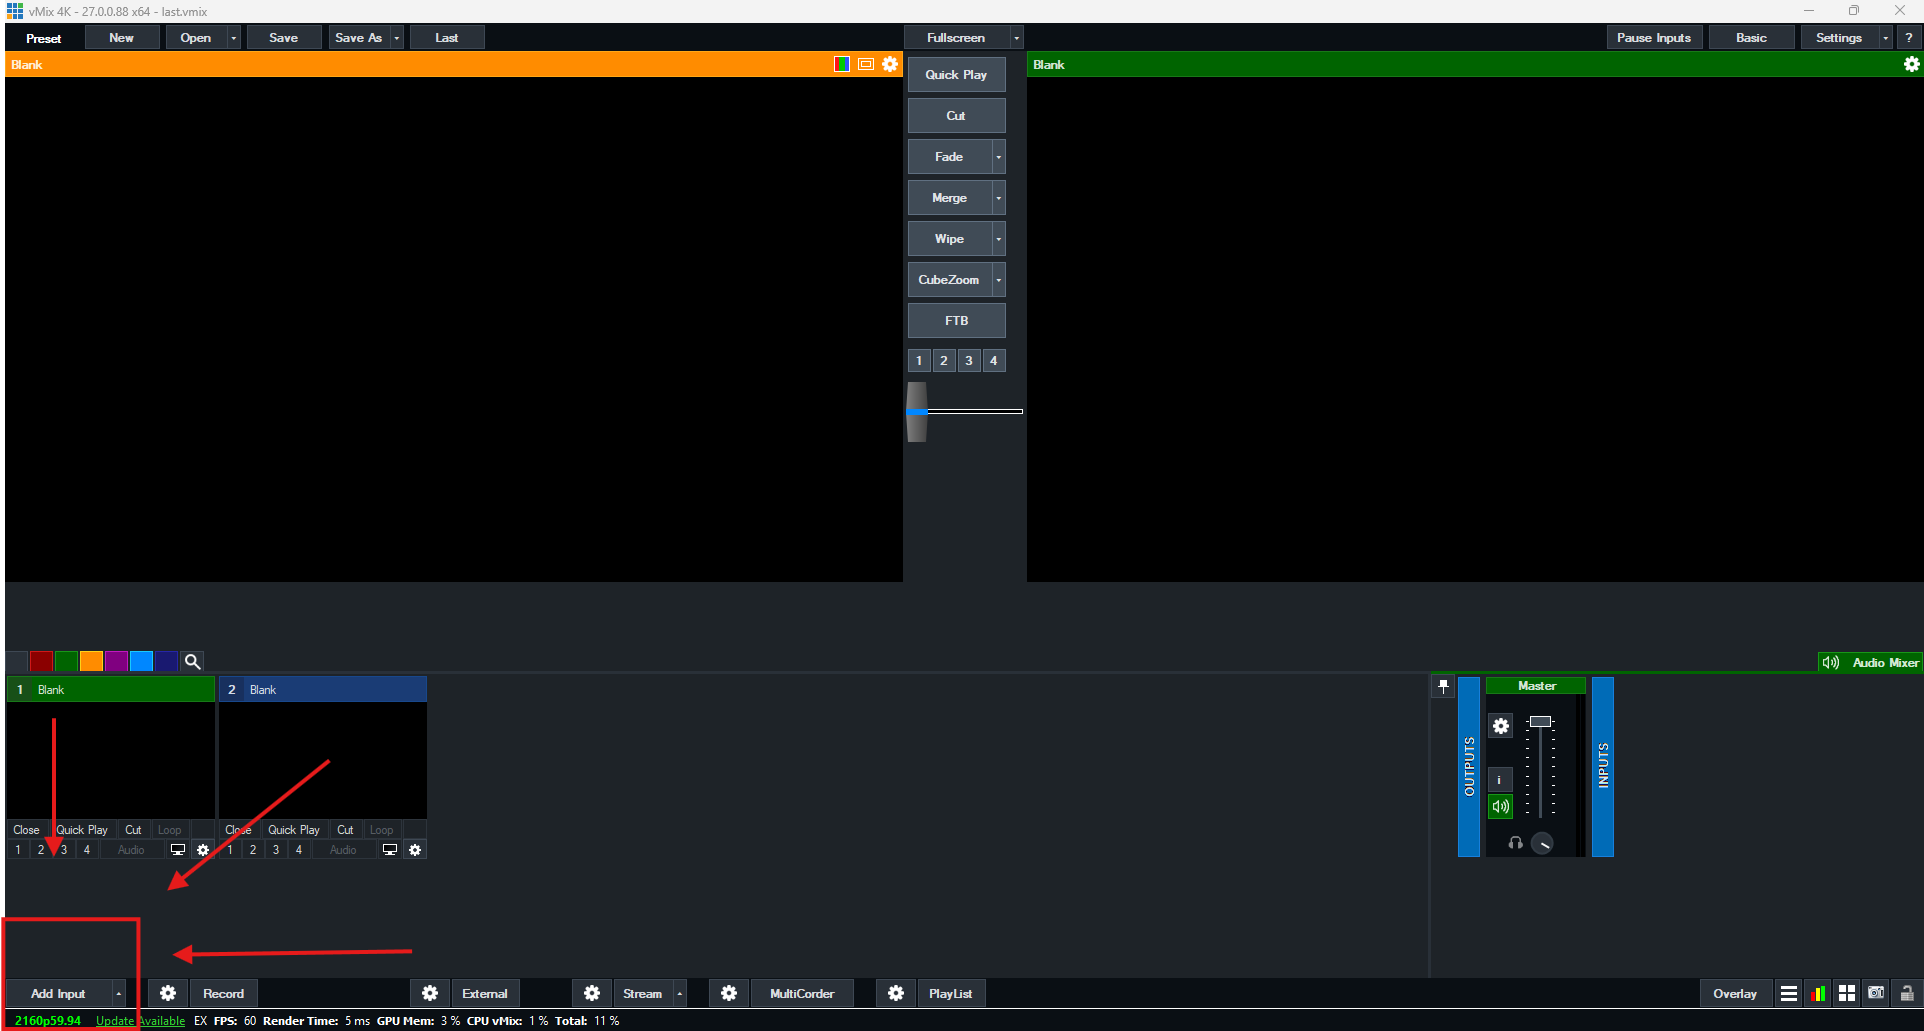
Open vMix on your computer and find the "Add Input" button located at the bottom left of the screen. Click on this button to open the input menu.
Step 2: Choose "Stream / SRT"
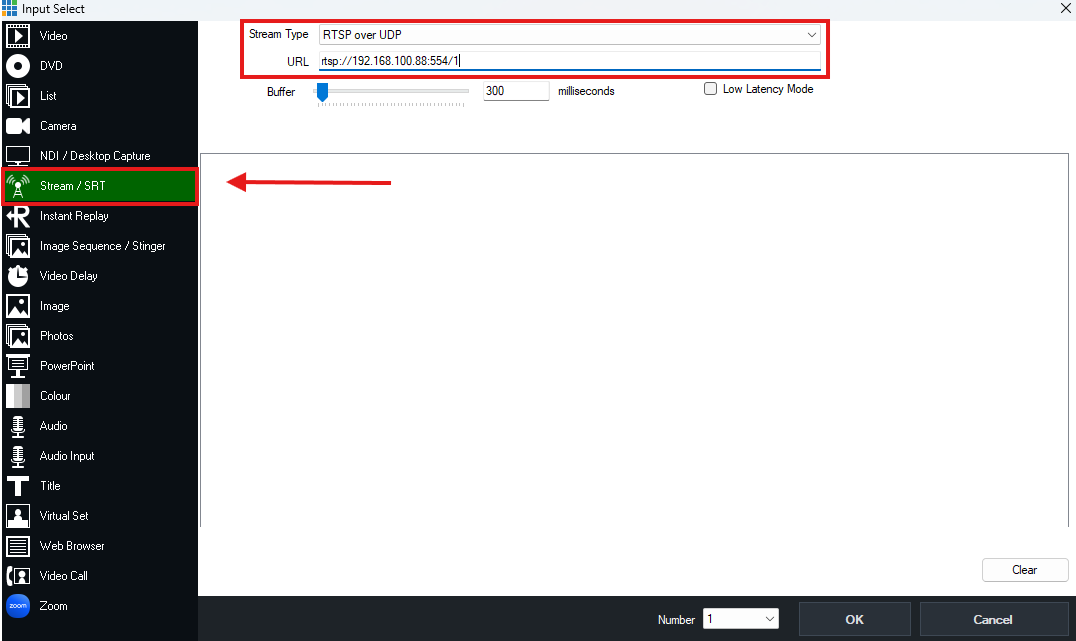
In the input menu, navigate to the "Stream / SRT" tab located on the left side of the window. This tab allows you to add network streams as inputs. Set the "Stream Type" dropdown to "RTSP over UDP". then in the URL bar, input the RTSP URL of your camera. Follow this structure for the URL: rtsp://camera-ip:554/1. Just make sure to replace the part that says "camera-ip" with the IP address of your camera. Once that is done, simply click "OK" and in a moment your camera should appear in the preview screen.
Option 2: NDI
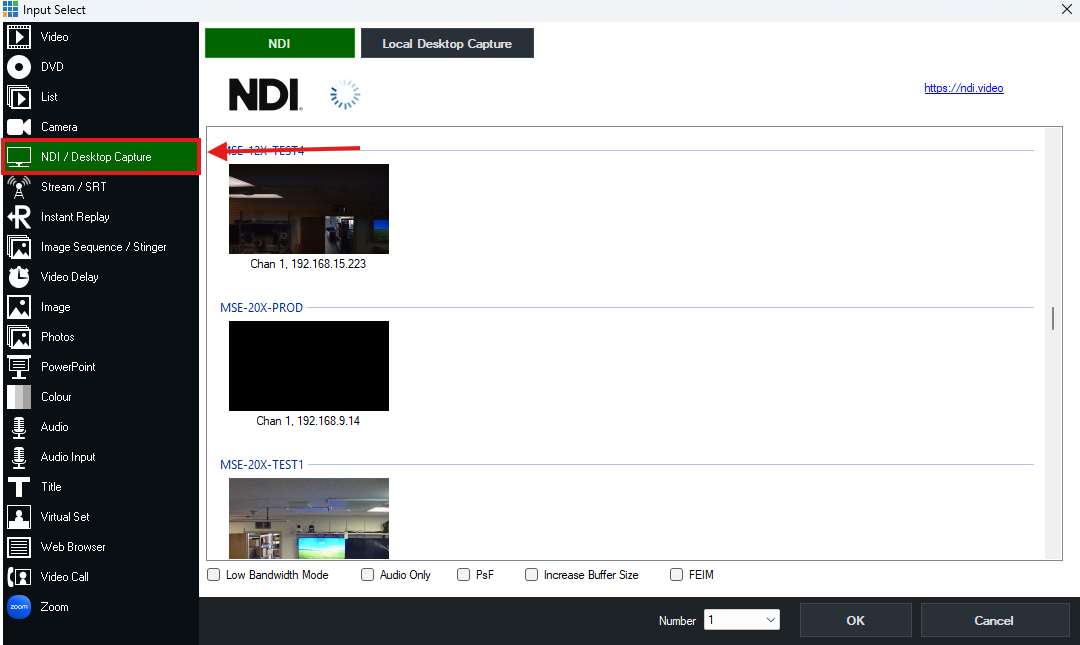
To add your camera as an NDI source Click the 'Add Input' button in the bottom left corner of the vMix interface. Then select the 'NDI / Desktop Capture / Video Capture' tab from the input menu. From there, choose your PTZOptics camera from the list of available NDI sources. Click 'OK' to add the camera as an input in vMix.
Option 3: USB or HDMI/SDI Capture Card
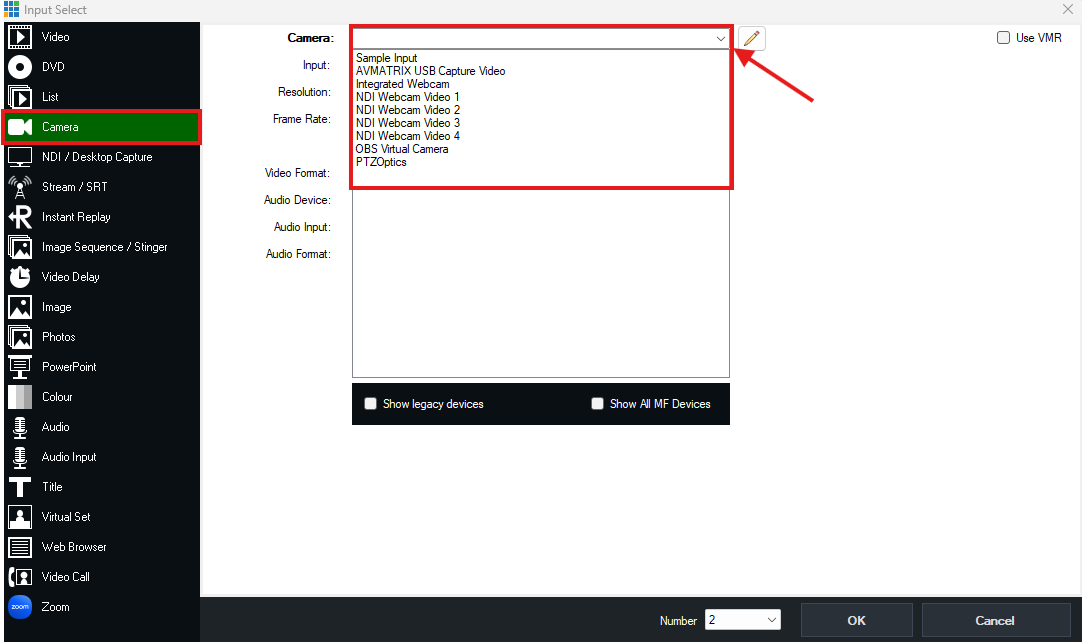
If you are using a USB connection, simply click the 'Add Input' button in the bottom left corner of the vMix interface. Then select the 'Camera' tab from the input menu. From there, choose your PTZOptics camera or capture device from the list of available video capture devices. Click 'OK' to add the camera as an input in vMix.
If you are using an HDMI or SDI connection, you will need a compatible capture card connected to your computer. Once the capture card is set up, follow the same steps as above to add the camera as an input in vMix.
Additional Resources:
For more detailed instructions and troubleshooting, check out the official vMix documentation: vMix knowledgebase.